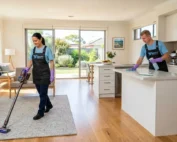
What Is a Professional Cleaning Service in Adelaide, Australia?
If you’ve ever Googled “professional cleaning service” and wondered what actually makes it professional — you’re not alone.
A lot of people assume it’s just a regular clean done by someone else. It’s not.
In Adelaide, a professional cleaning service is a formally operated business that uses trained staff, industry-grade equipment, and the right chemicals to clean a property to a measurable, documented standard — one that holds up under a real estate inspection, a health compliance audit, or a builder’s handover checklist.
This article explains exactly what that means — and why it matters for renters, homeowners, landlords, builders, and businesses across South Australia.

Understanding End of Lease Cleaning
End of lease cleaning is a contractual cleaning obligation tied to the tenancy agreement, not a routine household task. Unlike weekly cleaning, it is measured against the property's original entry condition report and must meet the standard set by the landlord or property manager. The cleaning covers every fixture, surface, and appliance inside the property — including areas tenants rarely touch during normal living, such as oven interiors, exhaust fans, window tracks, and skirting boards.
The process exists for one reason: to determine whether the rental bond is returned in full, partially deducted, or withheld. Because the bond is held by a state authority, the cleaning standard is not a matter of opinion — it is a documented requirement.
What Defines End of Lease Cleaning Standards
End of lease cleaning standards are defined by three sources: the tenancy agreement, the entry condition report, and the property manager's final inspection checklist. The tenancy agreement states the tenant's obligation to return the property in clean condition. The entry condition report records how the property looked at move-in, with photos and written notes. The inspection checklist lists the exact items the agent will check at handover.
A cleaning job meets the standard when every item on the inspection checklist passes visual and functional review. This includes grease-free oven racks, mould-free bathroom grout, dust-free vents, mark-free walls, and stain-free carpets. The standard is condition-based, meaning the property must match its original state — accounting for fair wear and tear, but not for dirt, grime, or neglect.
Difference Between Regular Cleaning and Bond Cleaning
Regular cleaning is surface-level maintenance performed during normal occupancy, while bond cleaning is a deep restorative clean performed once at the end of the tenancy to meet handover compliance. The two differ in scope, depth, and accountability – and only one determines whether you get your bond back.
| Factor | Regular Cleaning | Bond Cleaning |
|---|---|---|
| Purpose | Keeps the home livable | Makes the property handover-ready |
| Frequency | Weekly or routine | Once, at end of tenancy |
| Scope | Visible, high-use areas | Every internal surface and fixture |
| Depth | Surface-level wiping and vacuuming | Deep cleaning inside ovens, behind appliances, inside cupboards, on door frames, along window tracks |
| Standard | Personal preference | Fixed agency checklist |
| Accountability | None | Tied to bond refund |
| Outcome | Clean living space | Full bond return or deduction |
Why a Cleaning Checklist Is Critical for Tenancy Completion
A cleaning checklist is the single document that connects your cleaning effort to the property manager's inspection outcome. Without it, tenants clean by assumption — wiping what looks dirty and skipping what looks fine. With it, every task aligns with the criteria used at final inspection, removing guesswork and reducing the risk of bond deductions.
End of lease cleaning is not judged by how clean the property feels. It is judged by whether each item on the agency's checklist passes review.
Role in Property Inspections
End-of-tenancy inspections follow a fixed format. The property manager walks through with the entry condition report and a final inspection checklist, comparing the current state to the move-in state. Each room, fixture, and appliance is checked against four criteria — cleanliness, function, damage, and wear.
A cleaning checklist mirrors this process. It lists the same items the agent examines: oven interiors, rangehood filters, exhaust fans, window tracks, skirting boards, light fittings, wall marks, carpet condition, and outdoor areas. Following it means cleaning in the same order and depth the inspector reviews — the alignment that separates a first-pass inspection from a re-clean notice.
A checklist also serves as proof of work. Ticking off each item and photographing the result creates a record that protects tenants in disputes. If the agent claims an area was missed, the checklist and photos provide written evidence of completion.
Impact on Security Deposit (Bond Refund)
The rental bond is the largest financial outcome tied to end of lease cleaning. In most tenancies, the bond equals four to six weeks of rent, held by a state authority until the property is returned in acceptable condition. Cleaning failures are the most common reason for bond deductions, ahead of damage and unpaid rent.
A checklist directly protects the bond by ensuring every billable item is addressed before handover. Property managers issue deductions for specific, documented faults — grease inside the oven, mould on bathroom grout, dust in vents, marks on walls, or stains on carpets. Each fault is charged at professional cleaning rates plus an admin fee. Missing three or four small items can cost several hundred dollars.
When the checklist is followed in full, the inspection passes and the bond is released without dispute. When it is not, the tenant pays — through deductions, re-clean fees, or tribunal costs. The checklist, in effect, is the difference between a full refund and a financial loss.
Complete Room-by-Room End of Lease Cleaning Checklist
A room-by-room approach is the most reliable way to complete end-of-lease cleaning without missing inspection items. Each room has its own set of fixtures, surfaces, and appliances that property managers check against the entry condition report. Cleaning in sequence — one room at a time, top to bottom — prevents recontamination of cleaned areas and ensures every checklist item is covered before moving on.
The kitchen is the highest-priority room in any bond clean. It contains the most grease, the most appliances, and the most failure points during inspection. Most bond deductions in residential tenancies start here.
Kitchen Cleaning Checklist
The kitchen requires deep cleaning of every appliance, cabinet, and surface — inside and out. Property managers focus on grease residue, food buildup, and limescale, which accumulate in areas tenants rarely clean during normal occupancy. A complete kitchen clean covers cooking appliances, storage units, sinks, countertops, and built-in fixtures.
Oven, Cooktop, and Rangehood Deep Cleaning
The oven is the most inspected appliance in the kitchen. Property managers open the oven door, pull out the racks, and check the interior walls, base, glass, and seals for grease and burnt residue. A passing clean requires the oven to be free of carbon build-up, with shiny racks, clear glass, and no smoke odour when heated.
To clean the oven, remove the racks and soak them in hot water with a degreasing agent. Apply oven cleaner to the interior walls, base, and inner glass, and leave it for the recommended dwell time. Wipe out all residue, then clean the door seals and hinges with a damp cloth. Replace the racks once dry.
The cooktop – gas, electric, or induction – must be free of grease, burn marks, and food spills. Remove burner caps and trivets, soak them, and scrub them clean. Wipe the cooktop surface with a non-abrasive cleaner suited to its material. For glass cooktops, use a glass-safe scraper to lift hardened residue.
The rangehood collects grease in two places: the external surface and the internal filters. Wipe the exterior with a degreaser. Remove the metal filters and soak them in hot, soapy water for at least 30 minutes, then scrub and dry them before reinstalling. Disposable filters must be replaced.
Cabinetry and Storage Areas
Kitchen cabinets, drawers, and pantry shelves must be cleaned inside and out. Empty every unit completely. Vacuum out crumbs, dust, and debris from corners and drawer runners. Wipe each shelf, drawer base, and internal wall with a mild detergent solution, then dry with a clean cloth.
Cabinet exteriors collect fingerprints, grease splatter, and dust along the tops. Wipe all door fronts, handles, and edges. Pay attention to the tops of overhead cabinets, where dust and sticky grease build up over time.
Sink, Taps, and Surfaces
The kitchen sink must be free of limescale, water stains, and soap residue. Scrub the basin with a non-abrasive cleaner, paying attention to the drain, plug, and overflow holes. Polish stainless steel sinks with a microfibre cloth for a streak-free finish.
Taps and mixers collect mineral deposits at the base and around the spout. Use a limescale remover or a vinegar-soaked cloth to dissolve buildup and then buff dry.
Countertops, splashbacks, and benchtops must be wiped down with a surface-appropriate cleaner. Tile splashbacks need grout line attention using a soft brush.
Appliance Interior Cleaning
Built-in and freestanding appliances are inspected internally. Clean the dishwasher by removing the filter, washing it under hot water, and running an empty cycle with cleaner. Wipe the door seals, spray arms, and interior walls.
For the microwave, remove the turntable and wash separately. Steam a bowl of water with lemon to loosen grease, then wipe the interior.
The refrigerator and freezer require full defrosting before cleaning. Empty contents, switch off the unit, and let ice melt completely. Wipe shelves, drawers, door seals, and the rear vent. Leave the door slightly open to prevent odour buildup.
Bathroom and Laundry Cleaning Checklist
The bathroom and laundry are high-priority areas in a bond clean. Both collect moisture, soap scum, limescale, and mould. Every tile, fixture, and seal must be free of residue and odour.
Shower, Tiles, and Grout Cleaning
The shower is the most failure-prone fixture. Inspectors check the screen, tiles, grout, drain, and shower head for buildup.
Spray the screen with limescale remover, scrub, and squeegee dry. Clean both sides, including tracks and hinges. Apply cleaner across tiles, scrub, and rinse.
The shower head collects mineral deposits. Soak in vinegar, flush, and clear the drain of debris.
Toilet Sanitization
The toilet must be sanitised inside and out. A passing clean requires no stains or residue.
Apply cleaner under the rim, scrub the bowl, and clean the exterior, seat, and base thoroughly.
Mirrors and Vanity Units
Mirrors must be streak-free. Use a cloth to clean and avoid spraying directly on the mirror.
The vanity includes the basin, taps, drawers, and cabinet. Clean all surfaces, remove debris, and wipe interiors.
Living Areas and Bedrooms
Living rooms and bedrooms cover the largest floor area and contain the surfaces inspectors review first — walls, floors, windows, and built-in storage.
Clean each room from top to bottom — ceiling fixtures first, walls next, floors last.
Walls, Skirting Boards, and Fixtures
Walls must be free of marks, scuffs, fingerprints, and cobwebs. Clean around switches, door frames, and high-traffic areas.
Clear cobwebs from ceiling corners. Wipe door frames, doors, and skirting boards thoroughly.
Light switches, power points, and fixtures must be cleaned. Ceiling fans and light fittings need dusting.
Wardrobes and Storage
Wardrobes must be cleaned inside and out. Empty shelves, vacuum corners, and wipe all surfaces.
Clean wardrobe doors, handles, tracks, and edges.
Floor Cleaning (Carpet vs Hard Floors)
Carpets must be vacuumed thoroughly. Professional steam cleaning may be required.
Hard floors should be swept, vacuumed, and mopped using appropriate cleaners.
Windows, Tracks, and Frames
Windows must be cleaned inside and out where accessible.
Window tracks must be vacuumed and scrubbed clean.
Flyscreens, blinds, and curtains should be dusted or cleaned as required.
Outdoor and Additional Areas
Outdoor areas are inspected with the same standard as internal rooms.
Garage and Balcony Cleaning
Garages must be empty, swept, and free of stains and cobwebs.
Balconies must be cleaned, cleared, and washed. Railings and surfaces must be wiped clean.
Waste Removal and Final Clearance
All rubbish and belongings must be removed before handover.
Bins must be emptied and cleaned. Check all areas for leftover items.
Doors, Frames, and Light Fixtures
Doors must be cleaned on both sides, including edges and frames.
Handles, locks, and hinges must be clean and functional.
Light fixtures and fans must be dusted and cleaned properly.
Tools and Methods Used in End of Lease Cleaning
End of lease cleaning requires the right equipment and cleaning agents. Household tools alone cannot remove built-up grease, limescale, and ground-in dirt across an entire property. Each surface needs a different approach, and the right tools affect both the quality of the clean and the time it takes.
Professional Cleaning Equipment
Professional equipment is built for deep cleaning, not surface maintenance. The core toolkit includes a HEPA vacuum, a steam cleaner for tiles and grout, a carpet extraction machine, a pressure washer for outdoor areas, and colour-coded microfibre cloths split by zone — kitchen, bathroom, and general surfaces.
Multi-attachment vacuums handle carpets, window tracks, and air vents that household models cannot reach. Steam cleaners lift grease and sanitise grout without chemicals. Carpet extraction machines inject hot water and detergent, then extract embedded dirt — meeting the standard required for tenancy compliance.
Other essentials include extendable dusters, telescopic squeegees, stiff grout brushes, melamine sponges for wall marks, and scrapers for cooktops and ovens. Gloves, masks, and eye protection are required with strong chemicals.
Chemical vs Eco-Friendly Cleaning Methods
Bond cleaning uses two types of cleaning agents: industrial chemicals and eco-friendly alternatives. The choice depends on the surface, the residue, and the lease conditions.
Industrial chemicals deliver heavy-duty results. Caustic oven cleaners break down carbonised grease, acid-based cleaners dissolve limescale, and bleach kills mould at the root. They work fast and pass inspection on the first attempt. The trade-off is exposure risk and surface damage on natural stone, painted finishes, coloured grout, or certain plastics.
Eco-friendly methods rely on vinegar, baking soda, lemon juice, citric acid, and plant-based detergents. They handle light to moderate buildup well and are safer for allergies, pets, and sensitive surfaces. The limitation is depth — eco methods need longer dwell times and more scrubbing on heavy buildup.
The practical approach is hybrid. Use eco-friendly products on light surfaces and daily-use areas. Reserve industrial chemicals for high-failure points — ovens, rangehoods, bathroom grout, toilet bowls, and shower screens. This balance protects surfaces, limits chemical exposure, and still meets the standard required for full bond return.
Compliance Requirements and Inspection Standards
End of lease cleaning is judged against documented compliance, not general cleanliness. Every handover involves three reference points: the property condition report from move-in, the landlord's expectations for return condition, and the standards listed in the tenancy agreement. Meeting all three is what determines whether the bond is returned in full.
A property can look clean and still fail inspection if it does not match the documented entry condition. Understanding each compliance document — before cleaning begins — is the only way to plan the job correctly.
Understanding Property Condition Reports
A property condition report is the legal record of the property's state at the start of the tenancy. It includes written descriptions, photos, and condition ratings for every room, fixture, and surface, signed by both parties at move-in.
At handover, the property manager compares each item to the entry report. Differences beyond fair wear and tear are recorded as faults, and each fault can lead to a bond deduction. Tenants should review the entry report before cleaning — items recorded as damaged at entry are not the tenant's responsibility, but proof is required. Time-stamped move-in photos are the strongest defence in any dispute.
Fair wear and tear — minor carpet flattening, slight paint fading, small marks on switches — cannot be charged to the tenant. Damage, neglect, or insufficient cleaning can.
Common Landlord Expectations
Landlord expectations at handover follow a consistent pattern: the property must be returned in entry condition, fully cleaned, cleared of belongings, with all bills paid and keys returned.
Standard requirements include a fully cleaned interior — kitchen, bathrooms, bedrooms, living areas, and laundry — with attention to ovens, rangehoods, exhaust fans, window tracks, and skirting boards. Outdoor areas must be swept and maintained. Carpets must be professionally cleaned with receipts. Walls must be mark-free, with holes patched and tenant-installed fittings removed.
The property must also be in working order — bulbs functional, taps leak-free, doors closing properly, and tenant-caused damage repaired. The lease agreement is the final word on specific expectations, so read the special conditions before cleaning to avoid surprises.
Carpet Cleaning Requirements
Carpet cleaning is a separate compliance item in most tenancies. The standard is professional steam cleaning by a licensed cleaner, with a receipt provided at handover. Domestic vacuuming or hired shampooers do not meet the standard.
Professional steam cleaning uses hot water extraction to lift embedded dirt, allergens, and residue that vacuums cannot reach. The receipt — listing the rooms cleaned and the method used — serves as proof of compliance.
If pets were kept on the property, flea fumigation by a licensed pest controller is required, with a separate receipt. This applies even if no flea problem was visible. Property managers request both receipts before releasing the bond.
Stains, burns, and damage fall outside cleaning compliance. These are treated as damage and may incur repair or replacement costs, reduced for older carpets under tenancy law's depreciation schedule. Documenting carpet condition at move-in protects against unjustified charges at move-out.
Common Mistakes That Lead to Bond Deductions
Most bond deductions are not caused by poor effort — they are caused by predictable mistakes tenants repeat in every handover. The same issues appear on deduction notices regardless of property type or tenancy length. Knowing them in advance is the simplest way to avoid them.
Missing high-failure inspection items. Tenants clean what looks dirty and skip what looks fine — but inspectors check fixed items regardless of appearance. The most missed areas are oven interiors, rangehood filters, window tracks, skirting board tops, exhaust fans, and behind the toilet. Fix: follow a written checklist that mirrors the agency's inspection format.
Surface-level cleaning instead of deep cleaning. Wiping benches and vacuuming carpets is regular cleaning — not bond cleaning. Bond cleaning requires removing built-up grease, scrubbing limescale, and lifting embedded dirt. Fix: allocate 8 to 12 hours for a two-bedroom property and use the right tools.
Using the wrong products on the wrong surfaces. Acidic cleaners etch stone, bleach discolours coloured grout, abrasives scratch glass cooktops, and ammonia damages timber floors. Each mistake turns a cleaning task into a damage charge. Fix: read labels, test small areas, and match the cleaner to the surface.
Failing to document the work. Without proof, undocumented cleaning is treated as work not done. Fix: take time-stamped photos of every room, record a final walkthrough video, and keep all carpet and pest control receipts.
Cleaning too late or in the wrong order. Starting on handover day leaves no time to fix faults. Mopping before wiping skirting boards recontaminates finished surfaces. Fix: start two days early, work top to bottom, and reserve the final hours for checks and photos.
Leaving personal items or rubbish behind. Anything left in cupboards, garages, or balconies is recorded as a clearance fault and charged at flat rates. Fix: run a final empty-property walkthrough before returning the keys.
Ignoring tenant-caused damage. Picture hooks, scuff marks, and small wall holes are tenant responsibility. Patched early, they cost little. Left for inspection, they are charged at full repair rates plus admin fees.
Most bond losses are preventable. The difference between a full refund and a deducted bond usually comes down to planning, the right checklist, and enough time.
How to Evaluate Cleaning Quality Before Final Inspection
Evaluating cleaning quality before the final inspection is the last chance to catch missed items and avoid deductions. Most bond losses happen because tenants skip this step — they finish cleaning, hand over the keys, and discover the issues only when the deduction notice arrives. A structured pre-inspection review prevents that by simulating the property manager's walkthrough before it happens.
Inspect in daylight, not under artificial light. Natural light reveals streaks on glass, dust on dark surfaces, smears on mirrors, and water marks on stainless steel — all visible to inspectors but easy to miss indoors. Walk through each room mid-morning or early afternoon when light is strongest.
Use the agency's inspection checklist, not your cleaning list. A cleaning checklist confirms what was done. An inspection checklist confirms whether each item meets the standard. Walk through the property and mark each item as pass or fail. If it fails, re-clean before handover.
Inspect from the agent's perspective. Property managers open every cupboard, slide every drawer, lift every appliance lid, and run a finger along window tracks and skirting boards. Replicate the same pattern. Test high-failure points by running a clean white cloth across them.
Photograph every room. Time-stamped photos prove the cleaning standard at handover and help spot missed areas when reviewed on a larger screen. Take wide shots, close-ups of inspection points, and final shots of empty cupboards. Issues invisible in person often appear clearly in images.
Test functionality, not just cleanliness. Inspectors check that fixtures work. Run every tap, flush every toilet, open and close every window and door, and switch on every light, fan, and appliance. A non-functioning fixture delays bond release until corrected.
Focus on the eight high-failure points: oven interiors, rangehood filters, exhaust fans, shower screens and grout, toilet base and behind, window tracks, skirting board tops, and carpet edges. Inspect each twice. Use a torch to examine corners and seals.
Run a final empty-property walkthrough 24 hours before handover. Open every cupboard, drawer, and storage area to confirm nothing is left behind. Check keys, remotes, light bulbs, and smoke alarms. The 24-hour buffer leaves time to fix issues without rushing on handover day.
Get a second opinion. A friend or housemate not involved in the cleaning will spot issues you have stopped noticing. Familiarity blinds the eye to small faults.
If significant faults appear across multiple rooms, booking a professional bond cleaner for a partial re-clean is faster and cheaper than risking a full deduction. Most services offer a re-clean guarantee, returning at no extra cost if the property fails inspection within their guarantee window.
Self-evaluation is the difference between cleaning the property and passing the inspection. The gap between the two is where bond money is lost.
Cost Factors and Scope of End of Lease Cleaning
The cost of end of lease cleaning depends on the scope of work, the size of the property, and its condition at handover — not on a single flat rate. Understanding what drives the price helps tenants compare quotes accurately and decide between professional service and DIY effort.
Property size is the primary cost factor. Bond cleaning quotes scale by the number of bedrooms and bathrooms, since these determine the cleaning hours required. A one-bedroom unit takes 4 to 6 hours, a two-bedroom property takes 6 to 10 hours, and a three-bedroom house takes 8 to 14 hours. Bathrooms add disproportionate time because of the chemical dwell periods needed for limescale, mould, and grout cleaning.
Property condition at handover changes the quote significantly. A well-maintained property requires standard rates. A property with heavy kitchen grease, bathroom mould, stained carpets, or grime on walls requires extra hours and stronger chemicals — often adding 20 to 50 percent to the base price.
Inclusions define the actual scope. Standard packages cover the internal property — kitchen, bathrooms, bedrooms, living areas, and laundry. Carpet steam cleaning, pest control, external window cleaning, garage cleaning, and balcony pressure washing are usually quoted as separate add-ons. Reading the inclusion list before booking, and matching it against the lease requirements, prevents surprise charges.
Carpet cleaning is priced separately. Professional carpet steam cleaning is quoted per room or per square metre, with a minimum call-out fee. Pet flea treatment, where required, is an additional service. The carpet cleaning receipt is required for compliance, so this cost is rarely optional in carpeted properties.
Location, timing, and access affect price. Metropolitan areas have lower base rates due to higher cleaner availability. Regional locations attract travel surcharges. Last-minute bookings, weekend slots, and end-of-month dates carry premium rates. Booking 5 to 10 days in advance, on a weekday, usually secures the best price.
Bond-back guarantees add value beyond price. Cleaners who offer a written guarantee — covering a free re-clean if the property fails inspection — typically charge slightly more. The premium is worth comparing against the bond amount at risk.
DIY cleaning has hidden costs. Supplies, chemicals, and equipment hire usually total 100 to 300 dollars. Time costs 15 to 25 hours of physical work. The biggest risk is the bond itself — failed inspections can cost more than professional cleaning several times over. The DIY decision should account for all three: supplies, time, and risk.
In short, compare quotes on scope, not headline price. The cheapest quote often excludes the items that matter most for compliance.
Final Pre-Inspection Checklist
The final pre-inspection checklist is the last review before the property manager's walkthrough. It is not a cleaning list — it is a confirmation list, used to verify that every compliance item has been completed, documented, and prepared for handover. Run this checklist 24 hours before the inspection, in daylight, with the property fully empty.
Kitchen
- Oven interior, racks, trays, and door glass are grease-free
- Cooktop, burners, and trivets are clean and residue-free
- Rangehood exterior is wiped, filters cleaned or replaced
- All cabinets and drawers are empty, wiped inside and out
- Sink, taps, and drain are limescale-free and polished
- Dishwasher, microwave, and refrigerator are cleaned inside and out
- Splashback, benchtops, and tiled areas are wiped down
Bathroom and Laundry
- Shower screen is clear of soap scum and water marks
- Tiles and grout are scrubbed and free of mould
- Toilet bowl, seat, base, and behind the unit are sanitised
- Mirrors are streak-free
- Vanity, taps, and basin are clean and limescale-free
- Exhaust fan covers are dust-free
- Washing machine drum, detergent drawer, and laundry tub are clean
- Floor and floor drain are clear of debris
Living Areas and Bedrooms
- Walls are free of marks, scuffs, and cobwebs
- Skirting boards (top and base) are wiped clean
- Light switches, power points, and air vents are dust-free
- Ceiling fans and light fittings are wiped on every blade and surface
- Wardrobes and storage are empty, vacuumed, and wiped inside
- Carpets are professionally steam cleaned (receipt kept)
- Hard floors are mopped, edges and corners included
- Windows are clean inside and outside, frames and sills wiped
- Window tracks are vacuumed and scrubbed
- Curtains and blinds are dusted or cleaned
Doors and Fixtures
- All doors are wiped on both sides, including top and bottom edges
- Door handles, hinges, and locks are clean and functional
- Sliding door tracks are vacuumed and wiped
- Light bulbs work in every room
- Smoke alarms are operational
Outdoor and Additional Areas
- Garage is empty, swept, and free of oil stains
- Balcony, courtyard, or patio is swept and washed
- Railings, glass panels, and outdoor light fittings are wiped
- Outdoor drains are clear of debris
- Bins are emptied, washed, and placed correctly
Final Clearance
- All personal belongings and rubbish removed
- All keys, remotes, fobs, and access cards collected for return
- Carpet cleaning receipt ready
- Pest control receipt ready (if pets were kept)
- Time-stamped photos of every room and inspection point taken
- Walkthrough video recorded
- Entry condition report reviewed for comparison
- Lease agreement special conditions reviewed
Documentation Pack for Handover
- Carpet cleaning invoice
- Pest control invoice (if applicable)
- Photos of every room, every appliance interior, and high-failure inspection points
- Final walkthrough video
- Forwarding address and contact details for bond release
If every item on this checklist passes, the property is handover-ready. If any item fails, fix it before the inspection — not after. Once the keys are returned, the opportunity to correct faults is gone, and any deduction on the inspection report becomes the final outcome.